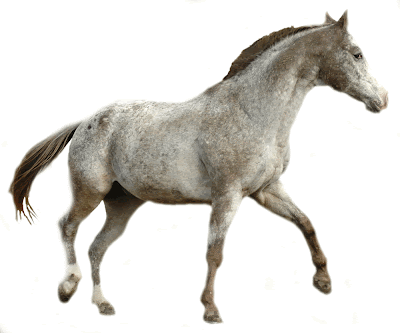
Here's an very effective little photoshop tutorial on how to remove the background and just have the main image remaining.
2. Open a blank photoshop document the same size as your image. Create a new layer ( layer>new layer ) and then paste your image onto the new top layer ( edit>paste ).
3. Once you have it open and on a new layer then you're ready to start removing the background. Now, here you have to make a decision. If you want your main object (for me, the horse) to have a more 'dreamy', blending edge to it then you will need to use a soft brush. Whereas, if you want a very slick, crisp edge then go for a harder one. So, click on the normal eraser tool and then select the brush you wish to erase with. (Here's where you'll be picking a hard or soft brush). If you want a hard brush then go for something like this:
3. Now, I'm going to go for a soft brush since in my opinion, I believe it gives a nicer, more realistic finish. Make sure you don't pick an overly blurry brush though because it can go too far the other way.
So, once you're ready, you can start erasing out some of the background. Start by erasing out all of the background except for that directly next to the horse.
4. Now you have to concentrate on the slightly harder part. Erasing the detailed outline of the main object. So, choose a slightly harder brush now. Not completly hard but not as blurry and soft as earlier.
5. Zoom in to your image (extremly close) and carefully erase out the pixels which are not your main image (the background). Try to keep it as neat as possible since this means less cleaning up later.
6. Continue to do this until you end up with a main image that has no excess background left on it. It may be a little rough and untidy at this moment but don't worry. The neatness and 'quickness' will come with time. Leave the mane and tail until last. We'll tackle that in a slightly different way.
Now,you should have your image nearly cut out (just tricky areas suchas mane or tail left). I chose this picture as an example because human hair is also extremly tricky and it's best to have practise before you try this with people.
7. Now we'll tackle the hair. Make your eraser brush (one you were just using) 1px in size. (Refer to the picture above about changing the brush size).
Once you have an extremly small eraser brush, zoom in to your image so that you're very close. Then begin to carefully erase away between the strands.
8. Continue to do this with both the mane and the tail. Do not worry at all that it looks awful and pixely at the moment! There is a trick to getting this to keep it's detail and smooth it out.
9. This is when I will show you how (only on some of my work) you can use brushes to smoothen out areas like the mane and tail without using a smudge tool and loosing all of the detail. Now, you can see that the next image on here looks like a clump of fur. Well, copy and paste this fur image into a new photoshop document. (We'll go straight back to your main image in a few minutes so don't get rid of it).
10. Now, after you have the fur image in photoshop, go to edit > define brush and name it something like 'fur brush'. This is crucial for our next stage.
11. Switching back to our main image now. You may delete the new fur image if you wish. It has served it's purpose. Now, go to the clone brush (looks like a stamp and is above the eraser tool). Once selected, go to your brush choice again and scroll right to the bottom of all yourbrushes. You should see your 'fur brush'. Choose this one.
Make it a size that is just a bit smaller than the length of the mane. (very small). I'm putting mine at a 20 px size. My image is quite big so yours may be smaller.
12. Now, simply hold down alt on your keyboard and click at the base of the mane. (When you hole alt, your brush will temporarily change to a little 'target').

What the clone tool does is duplicates some part of the image somewhere else. So, say you click your target down on the horse's hoof, then let go of alt. (That told photoshop that you want to duplicate that hoof somewhere else on the picture). Then you come up to the neck and start drawing as normal (with the clone tool but not holding alt) then rather than drawing with a colour, it will start to paint the hoof back in on the horse's back. Sounds like a useless tool but when used properly, can be very effective.
Now, I know what you're thinking. What on earth does this have to do with my image? I don't want to duplicate anything! Well, here's where the clever part comes in, watch and see.
13. So, you should have clicked near the base of your mane, so, now all you need to do is hover over the straggly ends of the mane and click to start painting in the colours again.
This step is hard to explain and really you just need to play around with it until you're happy. All it's doing is creating the same colours as the mane and adding them to the straggly cut out ends so that they look less 'pixely'. Here I have very quickly attempted my mane. Obviously this was only a 2 second try so I didn't have the time to go into detail with mine. After practise, I'm sure yours will look much nicer.

14. Do the same with the tail and you should be ready to get a background in there now.
15. Adding a background is easy. Search for an image that you wish to use as the background and right click > copy it. I used this image for mine: http://jsunsstock.deviantart.com/art/Magic-Forrest-103083391 It's just the first one that I could find. Try to pick a background image that will nicely contrast with your main cut out.
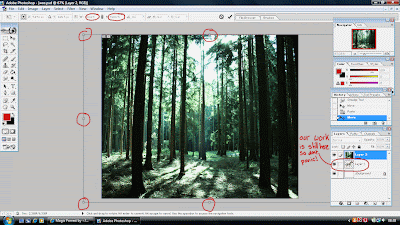
16. Paste it into the ocument we have been working off. Go to edit > paste. It should automatically paste on it's own layer. Now, don't panic if you can't see your cut-out since it will be below your background image (shown in the screen shot below). Your background will probably not be the correct size. You want your background to fit onto your document. At the moment, forget your cut out size because this will be resized as well. Just make sure the background fits nicely in the square. (It can overhang the square if you wish as long as the area you want as your background is in there). So, to resize it, go to edit > free transform. This will allow you to simply resize your background.

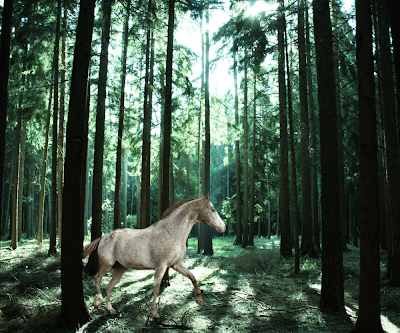
17. Once the background is resized and ready, simply grab your 'layer 1' (layer with your cut out on it and drag it above your background layer in the layers window. All this means is that your cut out will now be shown above your background. This may now be very big for your background, so to resize it, again go to edit > free transform and play with it as you wish.

18. Now, you should have your completed image!! =]

As simple as that,
Sam


