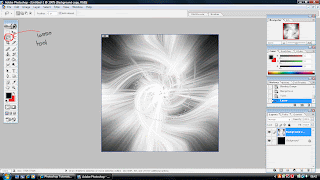
1. Firstly, open a new photoshop document any size and hit 'D' on your keyboard so your colours revert to the default settings of black and white.
2. Create a new layer (layer > new layer) and on this new layer we will filter some clouds (filter > render > clouds).

3. Then, go to filter > pixelate > mezzotint making sure that the type is set to short strokes.
4. Next, select filter > blur > radial blur and choose the following settings: Amount= 100 Blur Method= zoom Quality= best
5. Simply hit Ctrl + F to repeat the radial blur again.
6. Then go to filter > distort > twirl (again copying the following settings): Angle= 105%
Now you should have something like this:

7. Now, right-click on your swirly layer and select 'duplicate layer'. This will make another layer identical to the swirl.

8. Now, click on the top layer (one you just made) and go to edit > transform > flip horizontal.

9. Once you have done that, select the layer style (for the top layer again) to lighten rather than normal.
Now, you should have something that looks like this:

10. Hit Ctrl + E on your keyboard to merge the two layers together.

11. Filter > distort > twirl (add another twirl filter again) same twirl settings as before.
Now you should have something that looks like this:
12. Next, get the lasso tool and draw a rough oval/circle around the centre of your pattern
13. Feather the selection by going to Select > Modify > Feather (or using Shift+F6) and change the feather radius to 150pixels. This will not look any different at this stage. Select the inverse by simply choosing Select > Inverse (Ctrl+Shift+I).
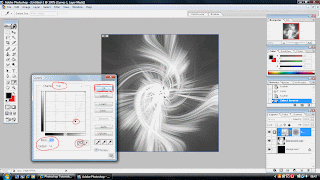
14. Next, with this selection, go to layer > new adjustment layer. (if a little popup window opens then just select 'group with previous layer' and hit ok) This should then bring you to a window similar to the picture below. Copy those settings.
15. Now, if you're happy with how it looks, select the adjustment layer and hit Ctrl + E to merge it down so we just have one easy layer again.
16. Go to image > adjustments > hue/saturation and select these settings
17. I’m going move the centre of the swirl off centre using the Transform tool, make sure you have selected the Swirl Layer, then Transform (Ctrl+T), enlarge the image so that you can move the centre, I’m going to move it towards the bottom right, you should end out with something similar to this:
18. Now, all that's left to do is sharpen it up a little. Go to filter > sharpen > unsharp mask and select the following settings. *9i*
 do is sharpen it up a little. Go to filter > sharpen > unsharp mask and select the following settings. *9i*
19. You're all done. You should end up with something like this. Why not experiment with different colours, sizes and adding extra outer glows etc. to really bring it to life.

As simple as that,
Sam


thanx man it help me a lot bye bye
ReplyDelete