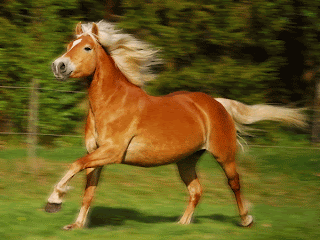
Choose an image that preferable is an action image. I chose a cantering horse ( from this stock horse site: http://limitofgold.deviantart.com ). I have decided that I would like to give this picture a bit of character by adding a nice motion blur to the background.
5. Next thing to do is change the mode back to normal. Simply hit 'Q' on your keyboard or click on the 'circle in a square' icon to the left near the bottom. Then it should automatically have a dotted selection line all around your main still picture.

2. To start, let's use the 'Edit in Quick Mask Mode' tool. The tool icon is a small circle in a rectangle and can be found under the colour swatches near the bottom of our main tool panel. (Or simply tap the letter 'Q' on your keyboard).
3. Once you have entered the mode then make sure your colours are set to white and black (default colours).
4. Now, using any normal brush (I normally go for a soft round brush) carefully paint over the section of your image that you wish to remain still and in-focus. So in my example I would want to paint the horse since I want the horse to remain still.
You should have something like this:
5. Next thing to do is change the mode back to normal. Simply hit 'Q' on your keyboard or click on the 'circle in a square' icon to the left near the bottom. Then it should automatically have a dotted selection line all around your main still picture.
6. Now, simply go to Filter > Blur > Motion Blur
7. Once you have the motion blur pop-up box you can tweak the settings to your liking. As you can see, for mine I used an angle of -7 and a distance of 16p. Choose whatever works best for your picture and have a play around with it to see.
As simple as that,
Sam


No comments:
Post a Comment